Some imported lessons will require editing to improve the lesson quality - particularly when the imported source file is a Youtube video with automatically-generated captions.
The lesson editor allows you to change lesson text, add/remove paragraph spacing, timestamp audio to text, add translations notes and more.
How to open the Lesson Editor
If you have edit access to a lesson, you will see an ‘Edit Lesson’ option by clicking the … button in the upper right corner of the LingQ Reader.
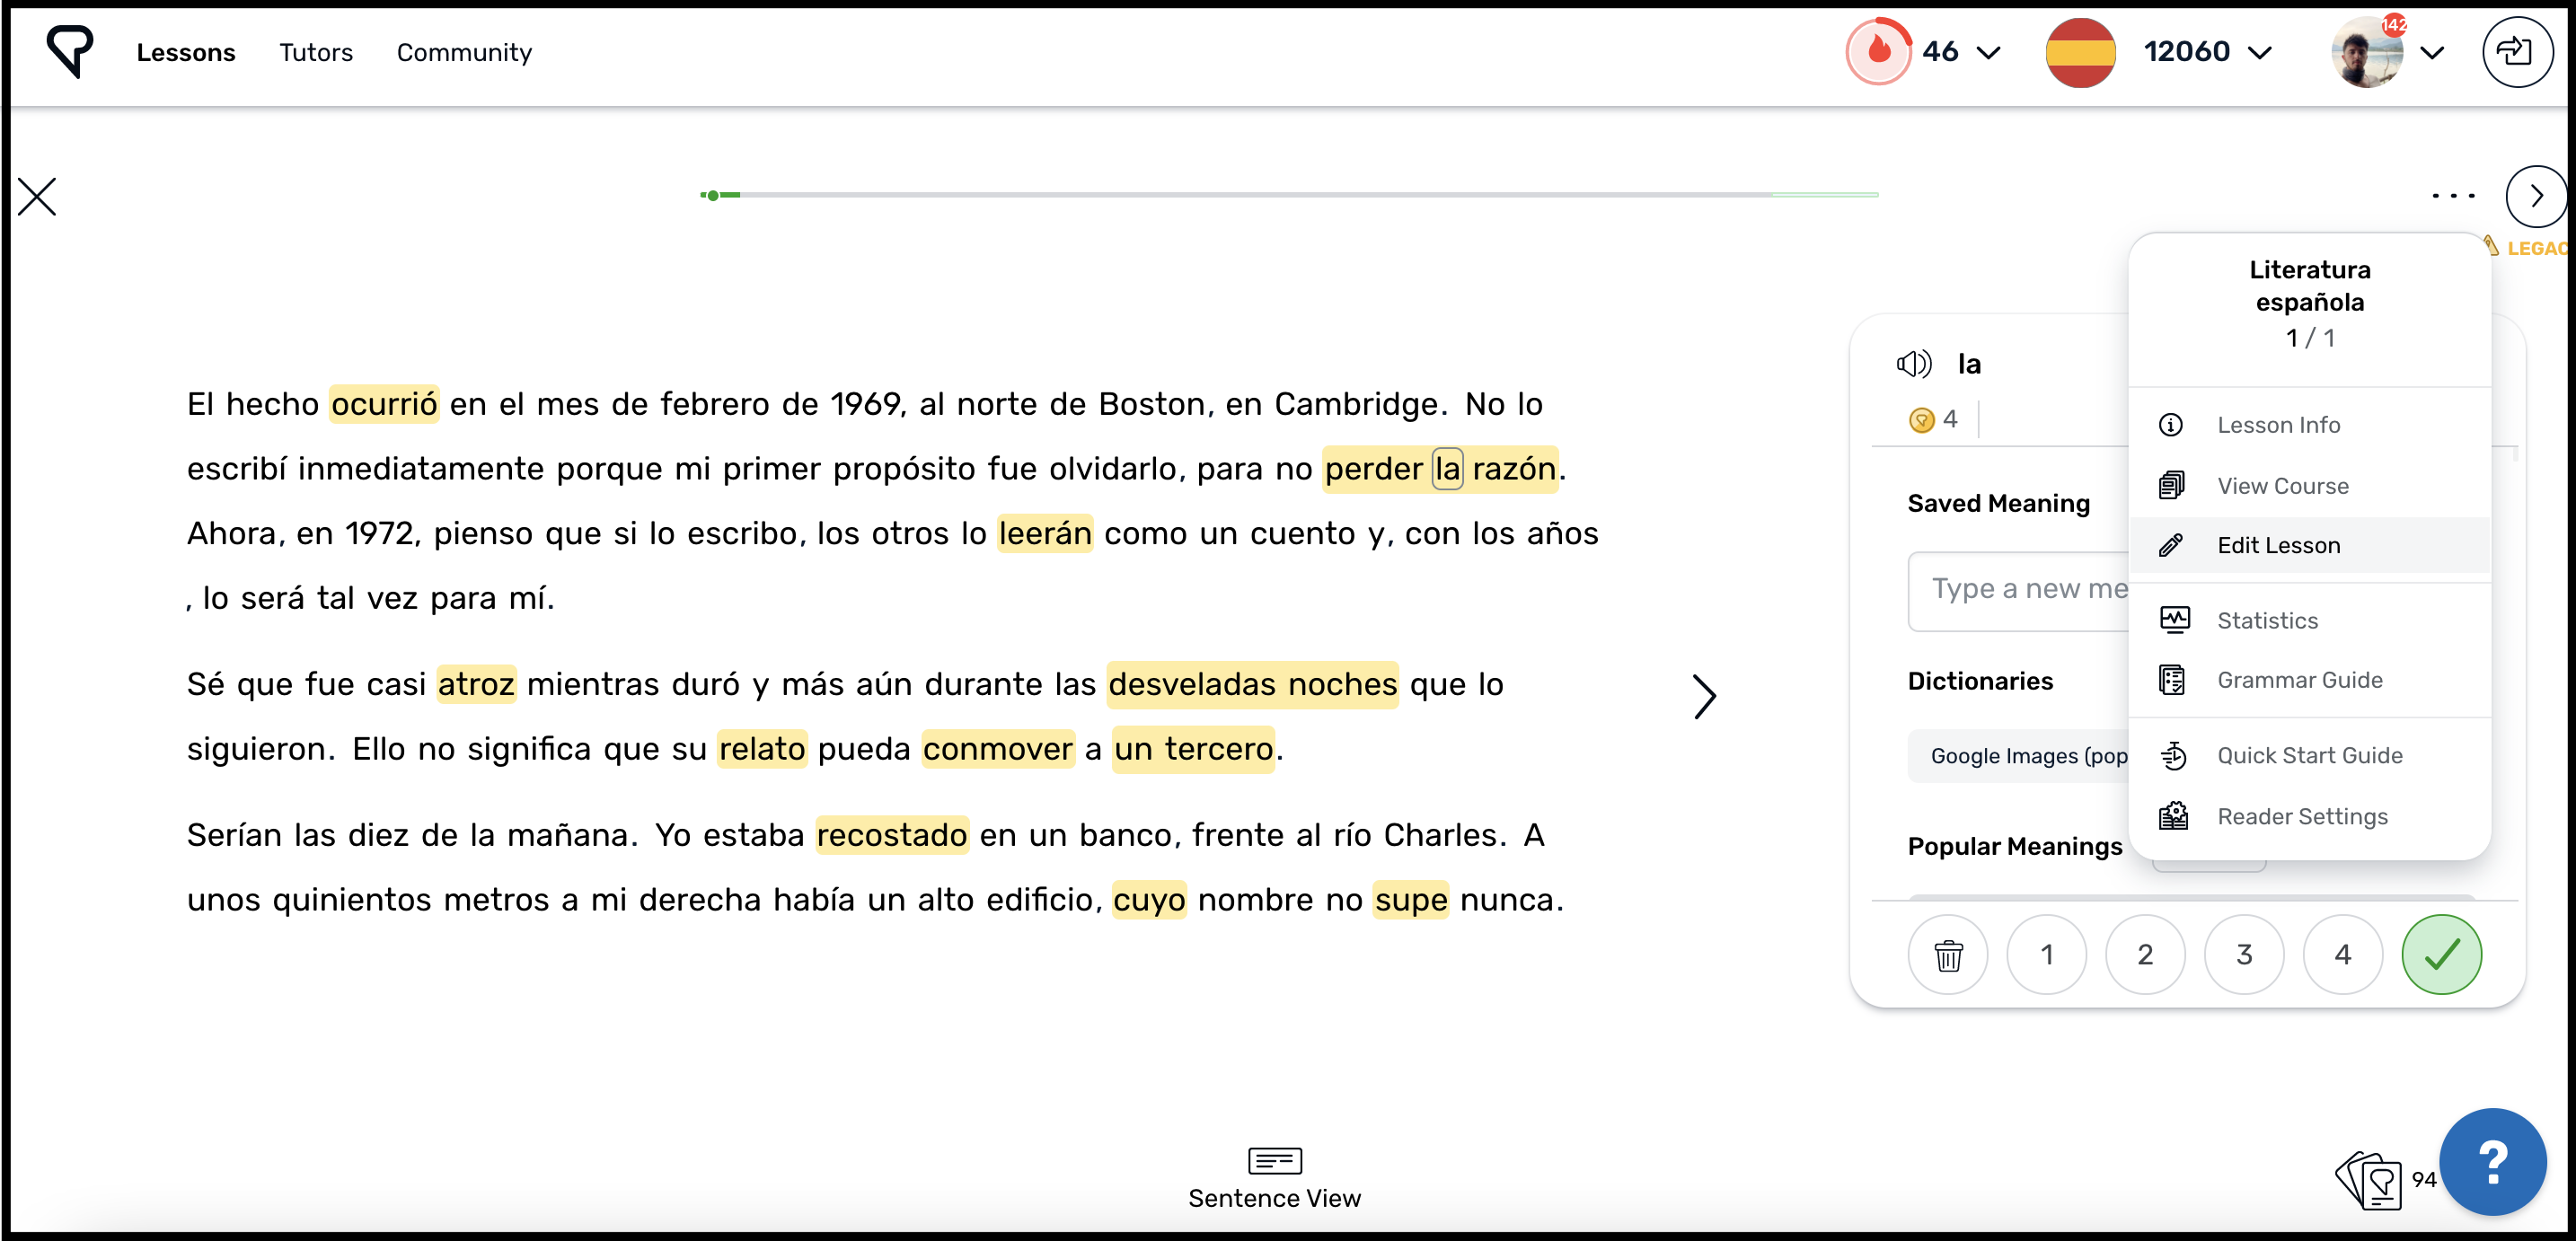
Click Edit Lesson to open the lesson editor.
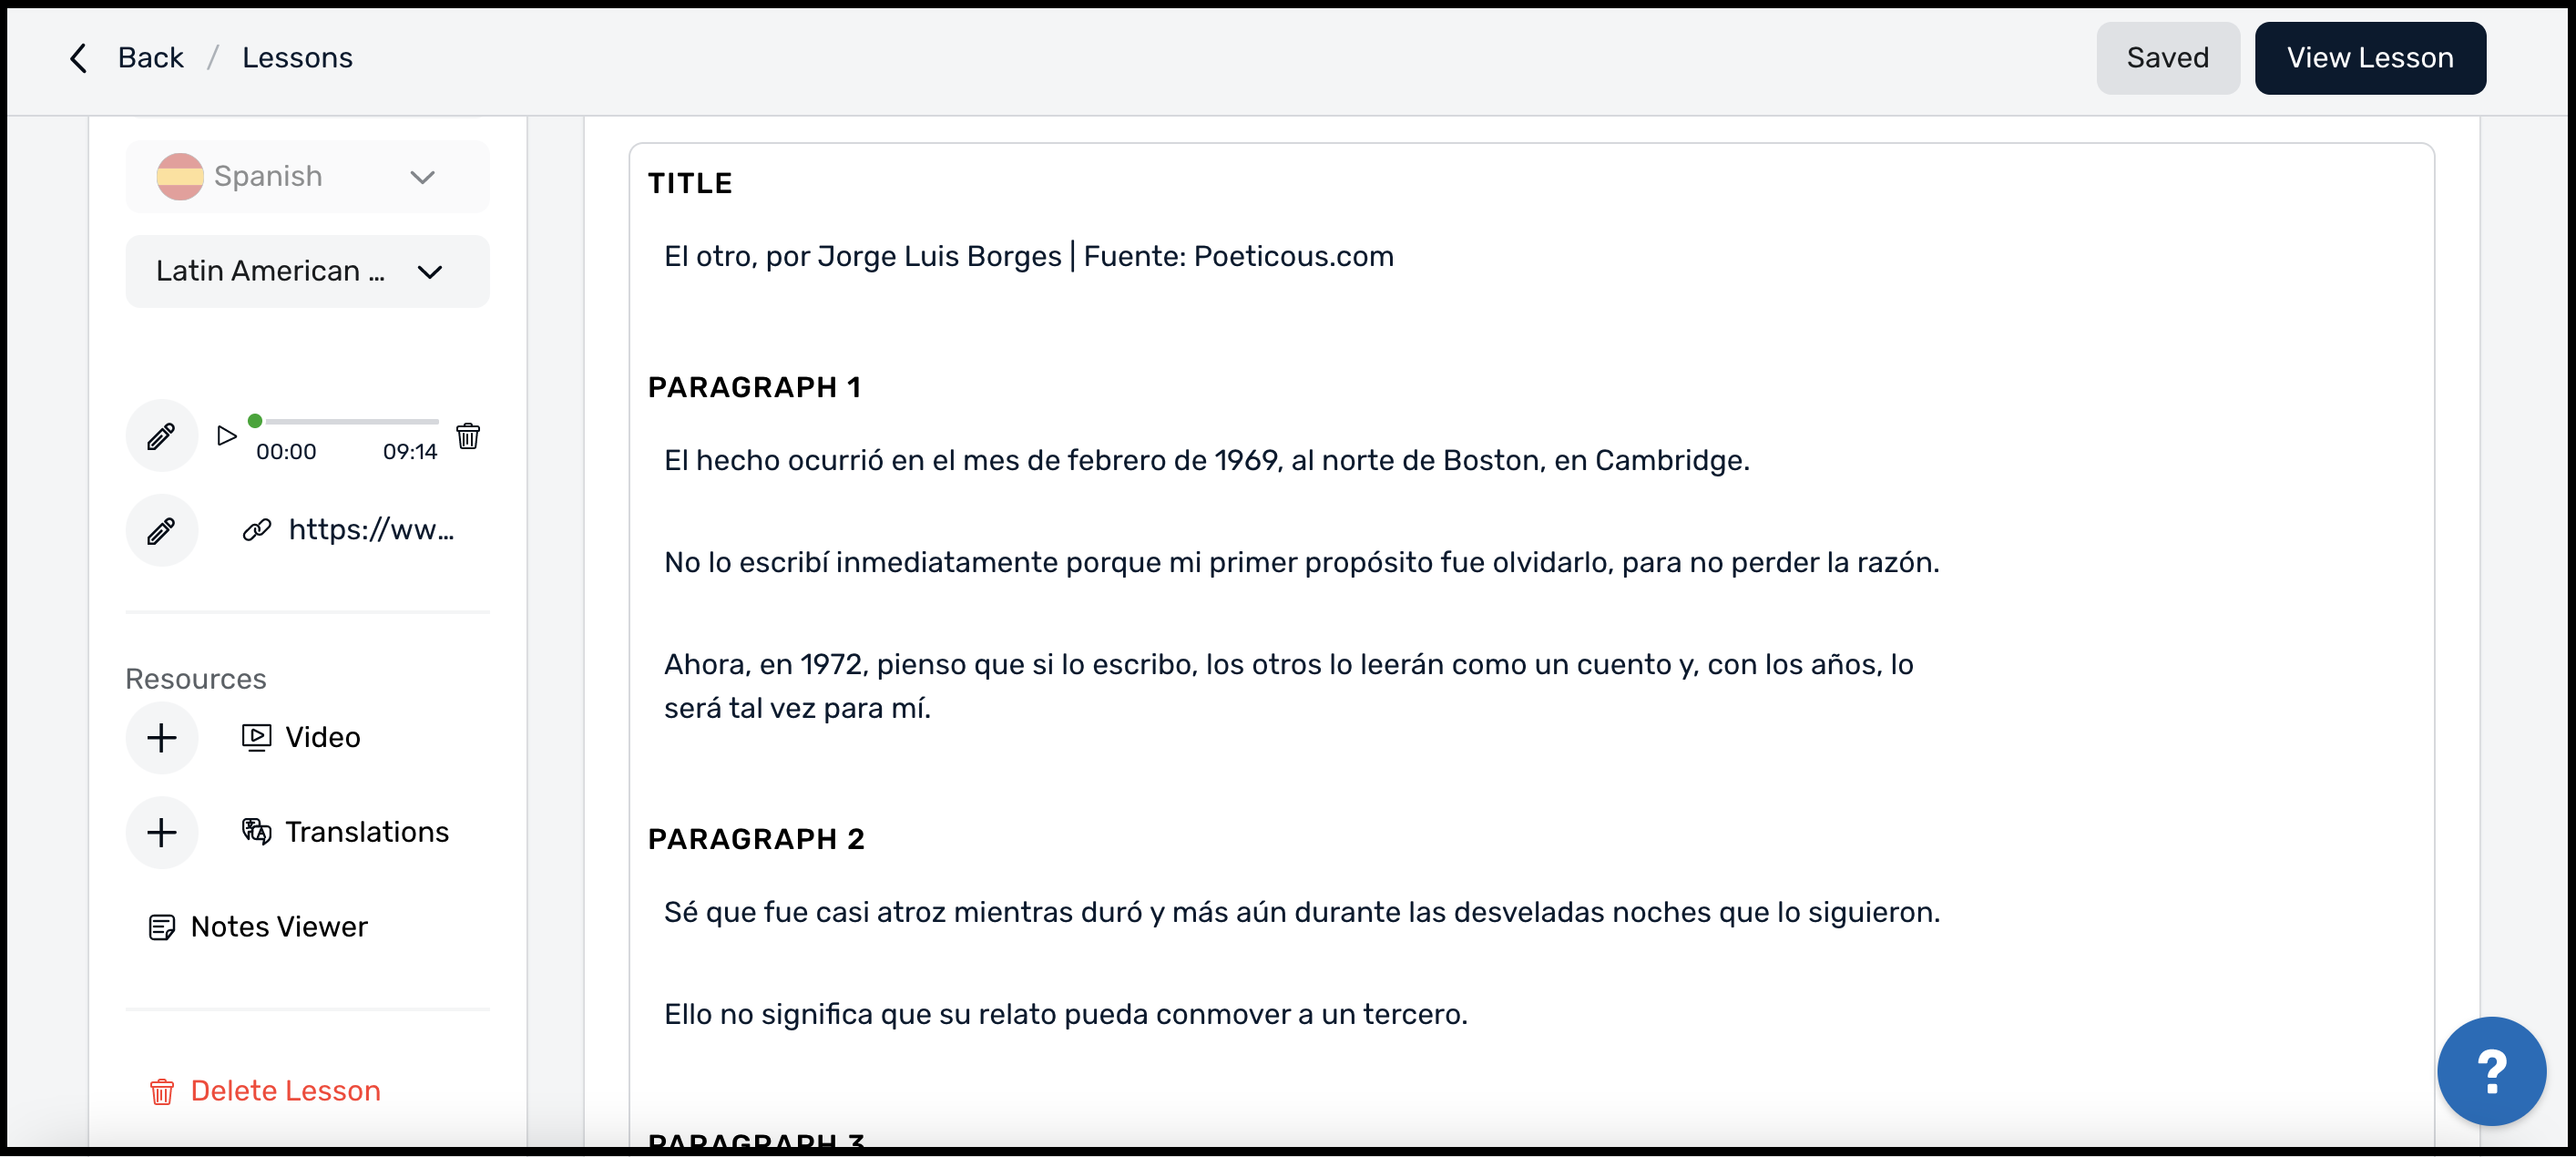
At the top of the editor, you can:
- change the lesson title
- add or change the description
- add or remove tags
On the left-hand panel, you can:
- Change the lesson’s level
- Add or change the lesson’s assigned accent (for Spanish, Portuguese, Persian and Arabic)
- Add or change the lesson audio
- Add or change the lesson video
- Add or change the lesson Translations
- View Notes (notes are added per sentence. See ‘How to edit a single sentence’ below)
What type of audio files are supported?
The only audio format accepted is .mp3. You can upload or drag and drop an .mp3 file. Or you can input an audio URL. The URL must be an mp3. A Youtube video URL, for instance, will not work.
How to add, remove or edit paragraphs
When a lesson is imported, the text is automatically organized into multiple paragraphs. And each paragraph contains one or more sentences.
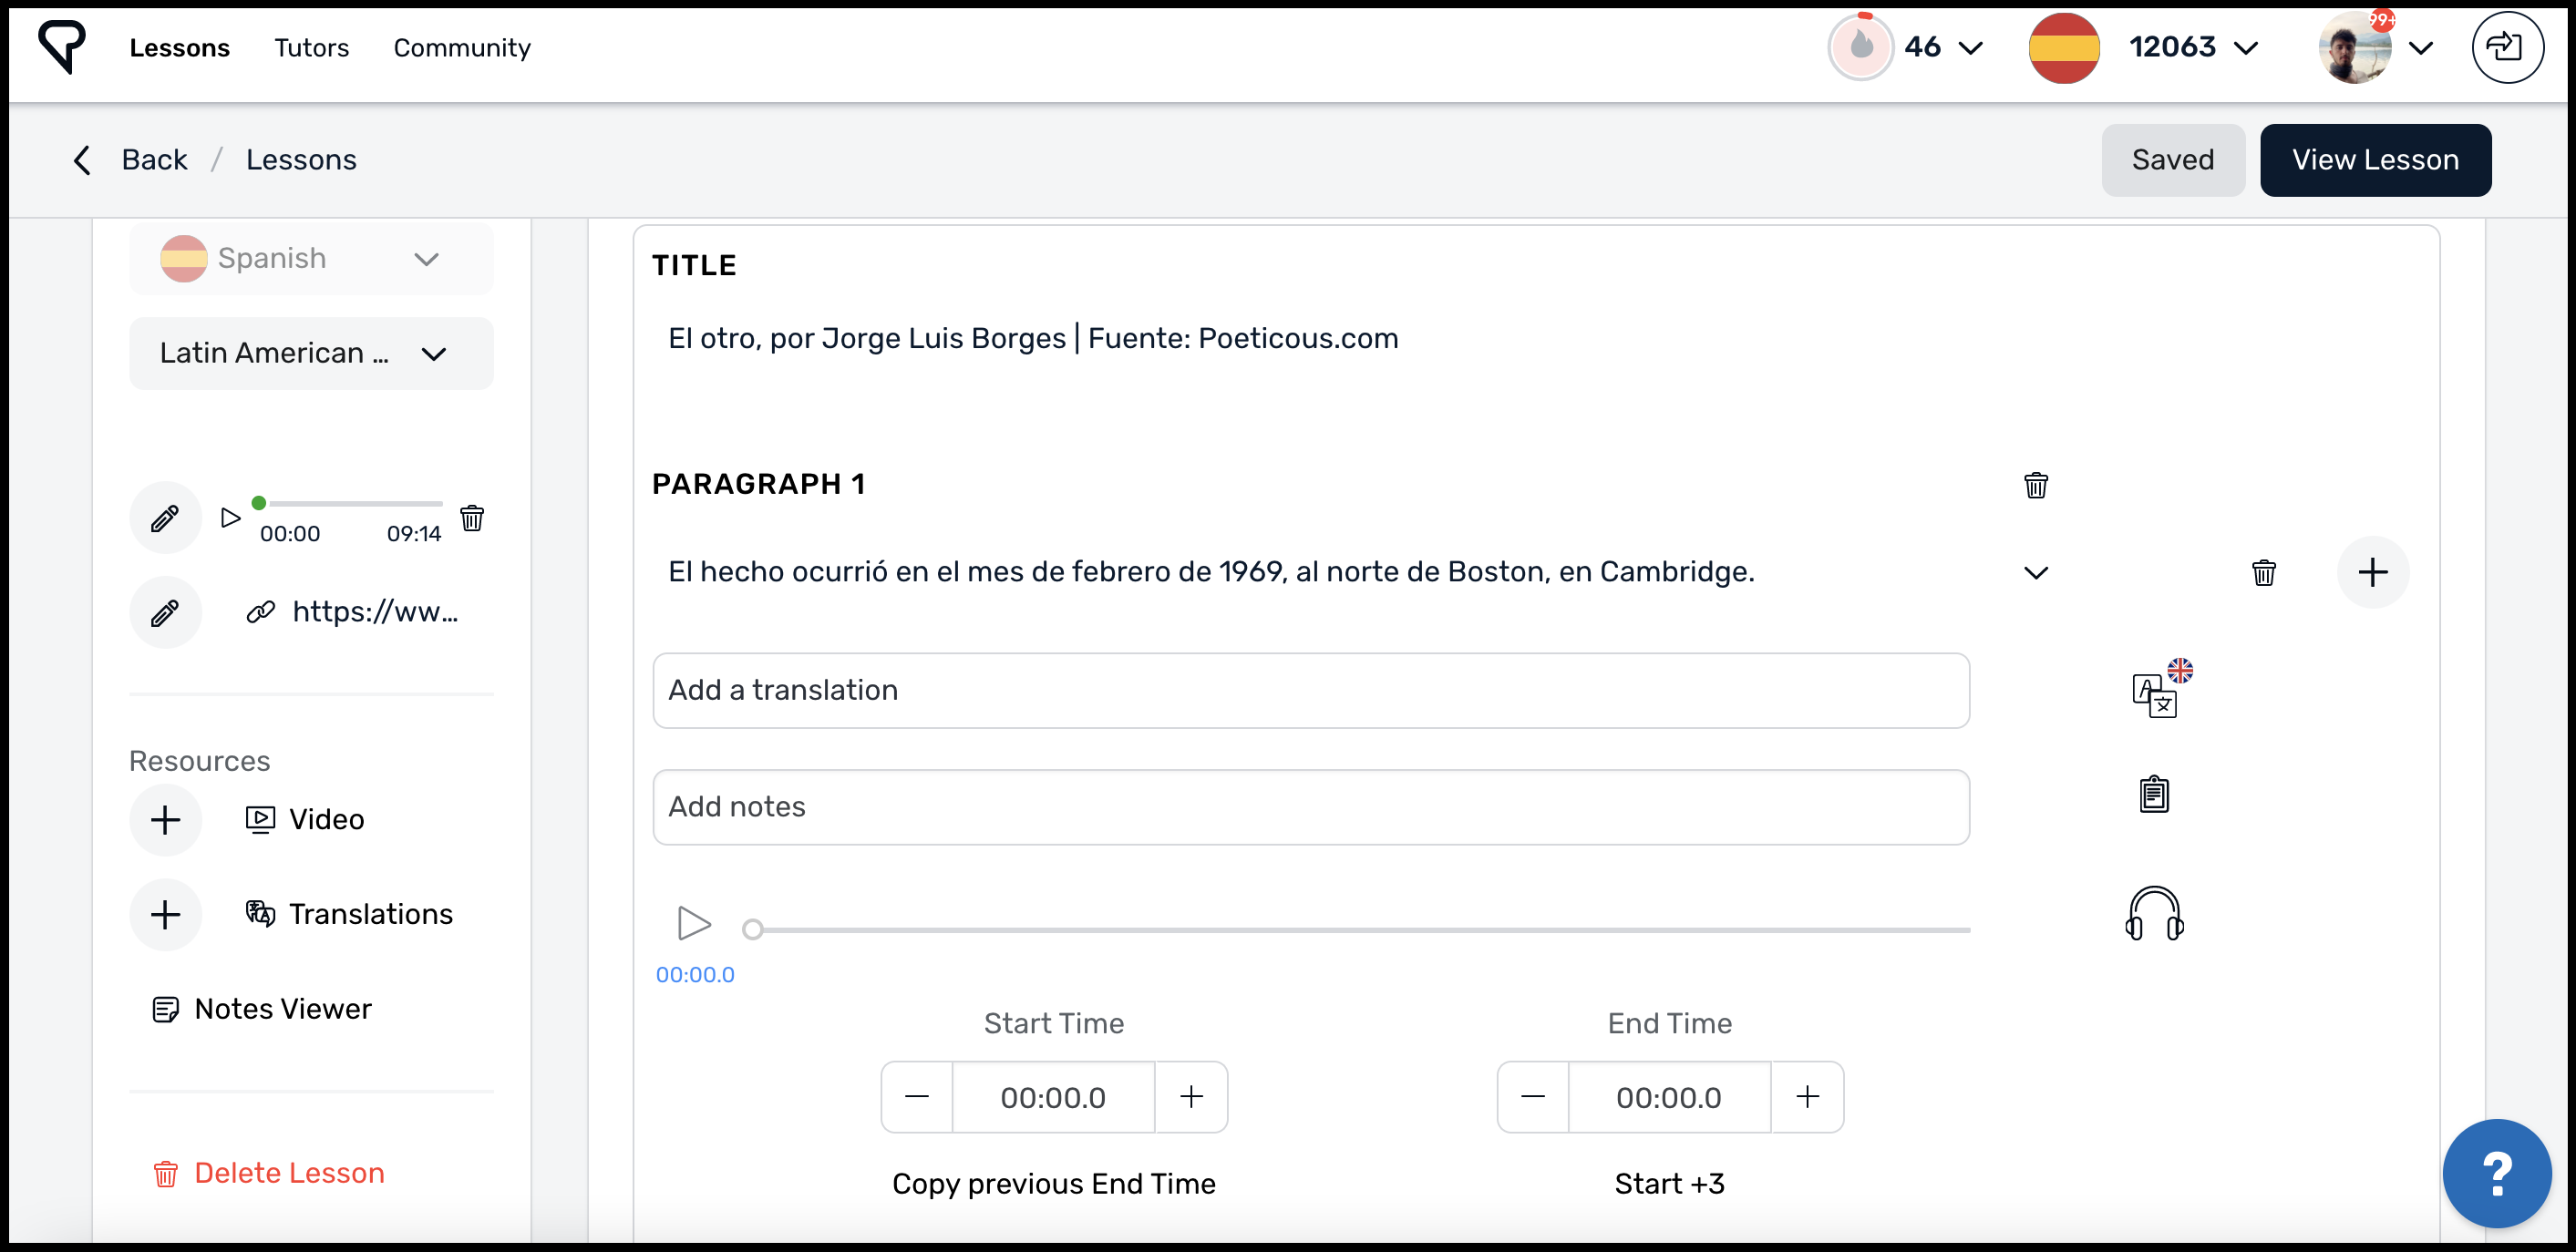
To edit a paragraph, click on one of the sentences within the paragraph. This will open up a field for adding a translation for that sentence and a field for adding notes. You can also click on the text to edit the text.
How to break a paragraph into multiple paragraphs
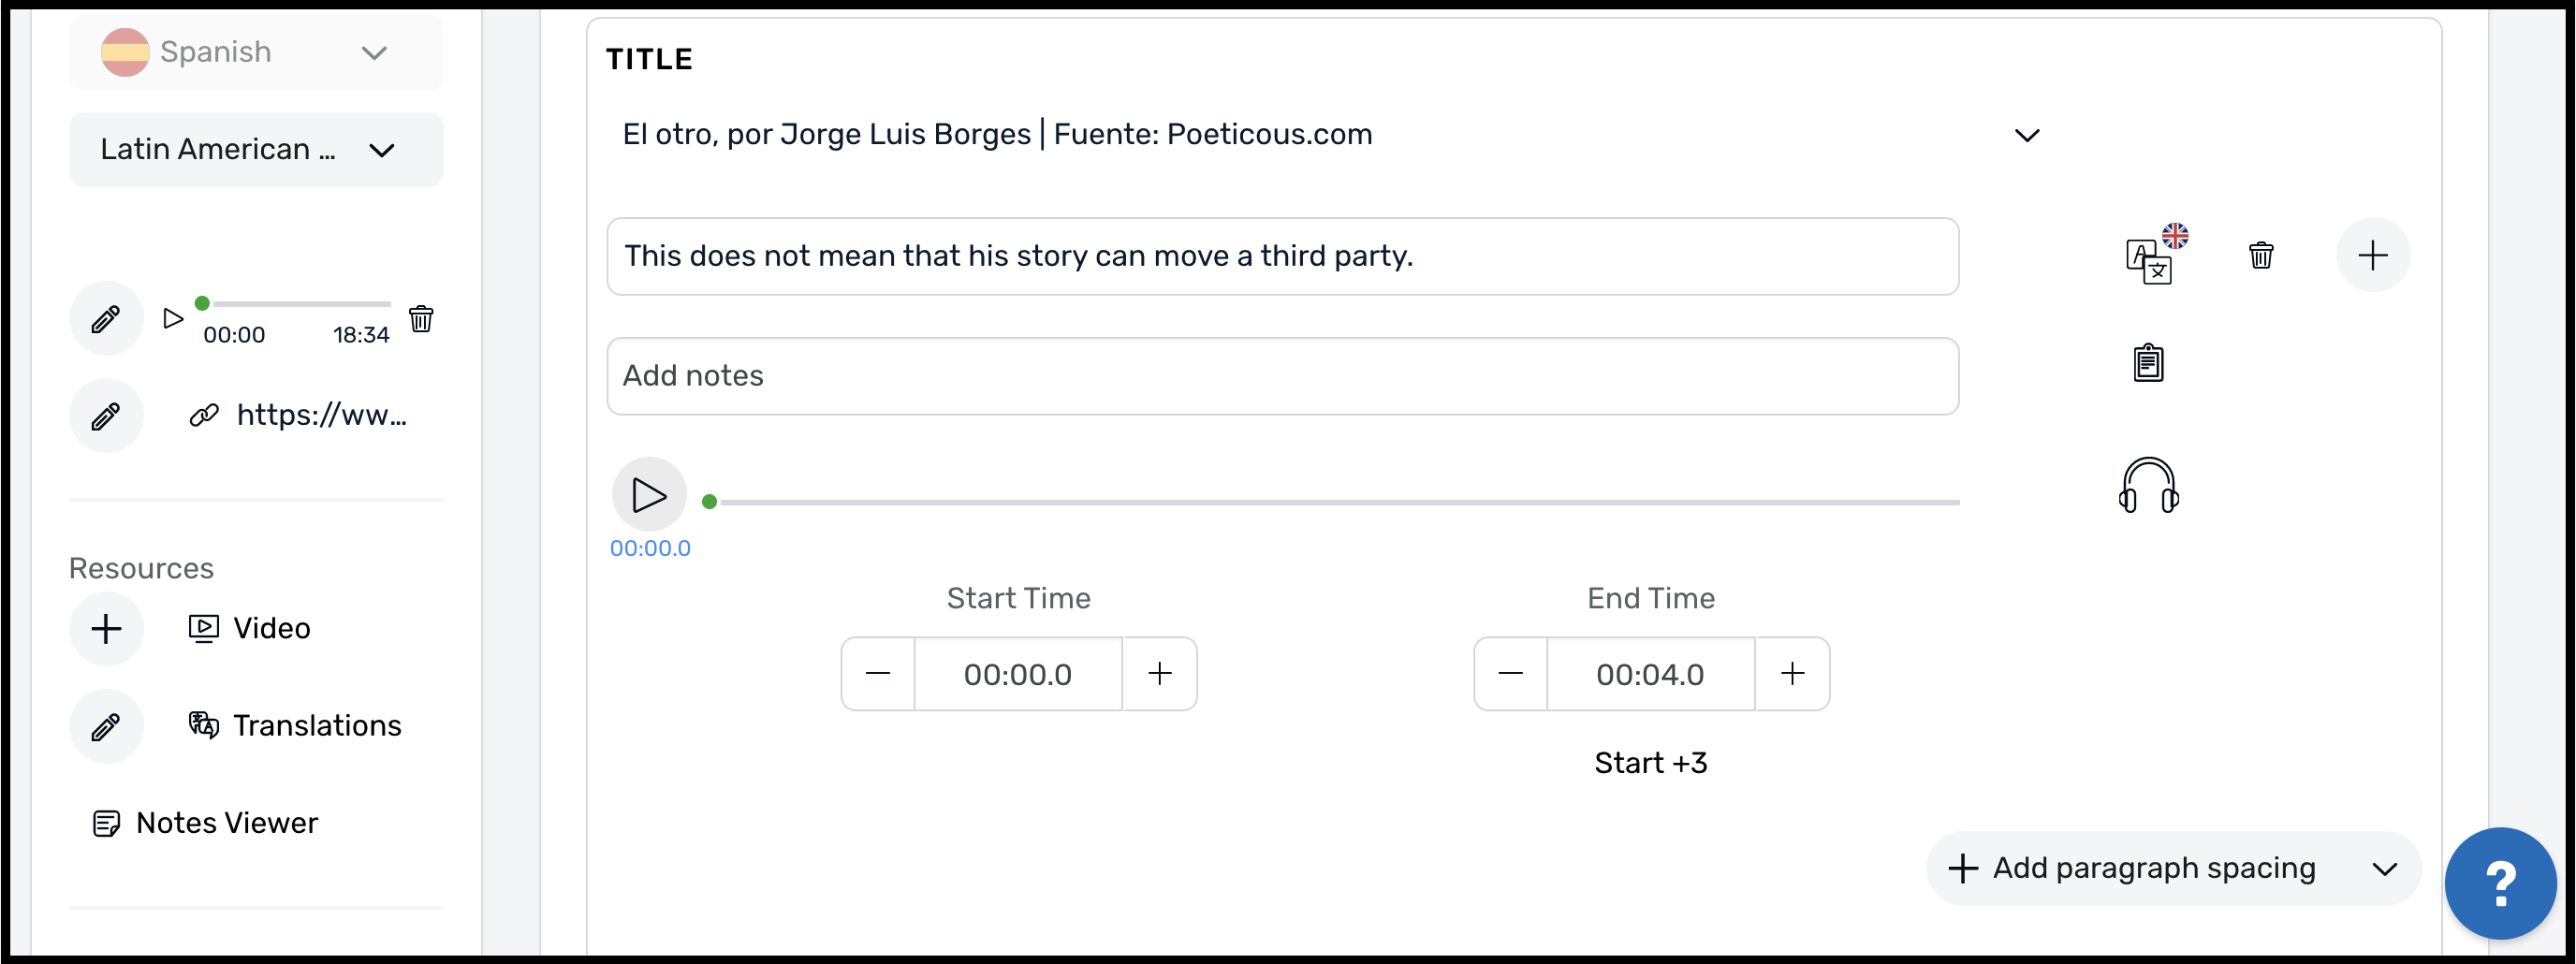
Click on the sentence which you want to end the first paragraph with. And click “Add paragraph spacing.”
How to combine multiple paragraphs into a single paragraph
Click on the first sentence of the second paragraph. And then click “Remove paragraph spacing.”
To add a sentence to a paragraph
Click on the sentence you wish to precede the sentence you will add. To the right of the text, you will see a plus button. Click that button to add a new sentence.
To delete a sentence
Click the trash can icon to the right of the sentence text and the left of the plus button.
To combine two sentences
Copy and paste the second sentence to the end of the first sentence. This will combine the sentences. Now you need to delete the original second sentence so it does not appear twice.
How to add translations
Translations can be added at the Lesson level and the sentence level.
Make sure to choose the appropriate language for your translation. Translations can be added for multiple languages.
Lesson-level translations
To add a translation at the lesson level, click “Translations’ in the left-hand menu under “Resources.”
Sentence-level translations
To add a translation at the sentence level, click on the desired sentence. This will open up an “Add a translation” field where you can enter the translation.
How to timestamp audio to text
- Click on the first sentence. If an audio file has already been added, then you should see an audio play icon, headphones and fields for Start Time and End Time.
- Click the play audio icon in the left-hand menu and note when the first sentence starts and finish.
- Adjust the Start Time and End Time for that sentence accordingly.
- Click the play audio button for that sentence to make sure it plays audio for that sentence and that sentence only. Adjust the Start Time and End Time if needed. Once that sentence audio is timestamped well, move on to the next sentence.
- Start by clicking the play audio button for that next sentence. And find the time where the sentence starts and adjust the Start Time accordingly.
- Then find the time the sentence ends and adjust the End Time accordingly.
- Play the sentence audio again to ensure the timestamp fits. Adjust if needed.
- Repeat steps 5-7 for all remaining sentences.
Changing the Lesson’s Share Setting
At the very bottom of the Lesson Editor is a drop down menu with the following options:
- Private Lesson: Only you will be able to view and open a Private Lesson
- Shared Lesson: Other LingQ users will be able to view and open Shared Lessons. You must include an image to share a lesson. And you can earn LingQ Points for sharing lessons [link to points article]
How to edit a single sentence
To edit a single sentence, open the Lesson and click View Sentence in the lower center of the reader to open Sentences View. Then click the … button in the upper right corner of the Reader. And choose ‘Edit sentence.’
Here you can do the following:
- Edit the sentence text
- Add or edit the translation
- Add or edit the note
- Change the audio timestamping
Click the < or > button to move to the previous or next sentence.
Make the best lessons possible
The LingQ lesson editor will help ensure the highest quality lessons, in which the reading and listening experience is smooth and error free.
Happy LingQing!